Activities & Tips
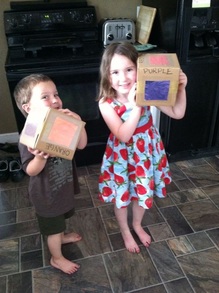
Sensory Bags
Get Creative
Fill plastic bags with different gels, soaps, oils.
Add food coloring, glitter, beads, anything else you can find!
Fun to touch and watch move and create different weights.
HELPFUL TIPS:
Buy regular zip close bags, not the ones with the slide pull zipper...they leak!
Use your colored duct tape to increase the longevity of your new bag. Tape closed the top zip portion so children don't make a mess, or even use tape around the entire outside side seam to help avoid leaks and tears.
For especially destructive little ones, or those who like to chew on things when you are not looking, you can use your colored tape to tape the bag right to the table or a placemat. That way they can't get it into their mouth and break the bag.
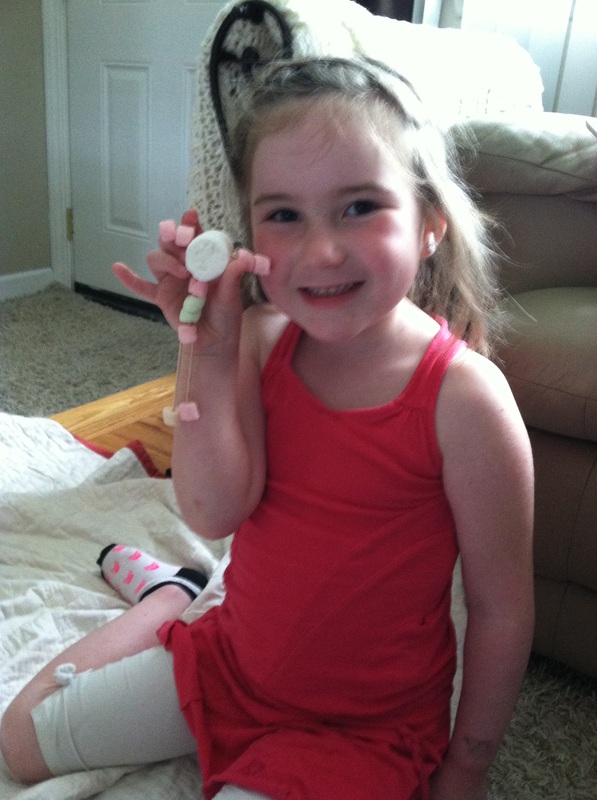
Building with Marshmallows
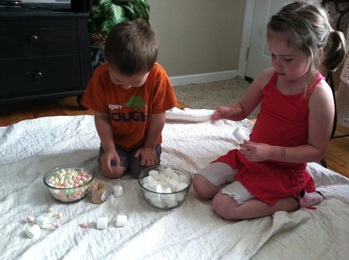
Grab some toothpicks and get to work!
Fun and creative challenge. Teach them how to create a particular pattern or encourage their creativity by challenging them to make up something on their own.
Good for tactile and proprioceptive function as well as visual coordination...and it's yummy :)
HELPFUL TIPS:
Get different sizes and colors of marshmallow for more visual stimulus.
Try other materials in the same way. Maybe plastic forks and grapes or shish kebab skewers with bananas and cereal. Imagine the many ways this activity can be reproduced.
|
|
|
GOOP (Non-Newtonian Substance)
Equal parts, cornstarch and water, mix, experiment. Add more of one, more of the other. Watch it change. A non-Newtonian substance does not fit perfectly into the three states of matter. This is neither liquid nor solid. When it is moving, it is solid. When you stop, it returns to a liquid. You can roll it into a ball and then when you stop rolling it drips down your hand like a goopy liquid. Such Fun!
BE WARNED! MESS FACTOR - 10!
HELPFUL TIPS:
Don't put all your cornstarch in one basket, so to speak. Start slowly and then you have more to add if need be.
Add food coloring to your goop to make it more fun (may stain hands slightly).
If you are worried about the mess, lay down a plastic disposable tarp (like a $1 store table cloth).
When you get to clean up, use a dry rag on your floor first. Using a wet rag will make the mess goopier as you clean. Wipe with a dry rag and/or vacuum first, and then wash as usual.
The Clothespin Games
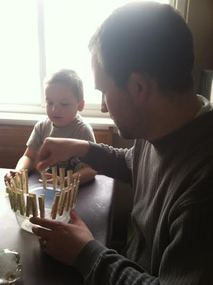
Get ready to create your own games...one of the more versatile props...CLOTHESPINS!
1. Grab a bowl. Clip the pins to the side and have the child take them off and put them in the bowl. Make 2 bowls and race with them. Make sure to tell the child the rules...they must take one at a time and they must squeeze the ends not just pull (you can do a pull race too but these will work different senses and motor skills). Or reverse the race and have the child race to put them back on.
2. Shred piles of newspaper. Hide the clothespins in the pile of shredded of paper. It's a needle in the haystack game. Dig through until the child finds them all or a predetermined number and then give them a prize like a county fair game.
3. Use the clothespins as tongs or tweezers to move craft pom poms from a bowl into an ice cube tray. What else can you use?
4. String up a clothesline inside with silly clothing articles pinned up. Have the child reach different heights and pull down different textures, fabrics and weights. Have them put the clothing pieces on until they get them all off the line.
5. Use your clothesline to help teach capital and lowercase letters. Make index cards with the capitals and lowercase letters on them. String them on the clothesline and have the child try to match them up. Make sure they are still squeezing off the clothespin for the proprioceptive and fine motor work! Re-invent this game a 100 ways...use numbers, colors, animals, sounds, ANYTHING!
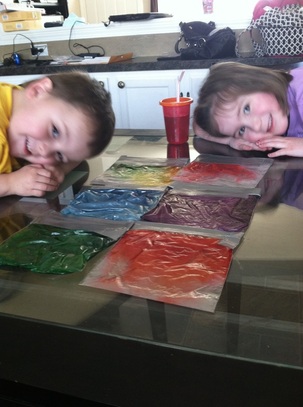
Painting with Marbles
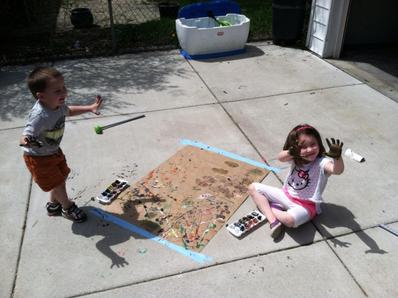
Use an ice cube tray. We use washable tempera paints. Put a marble in each color. Roll the marbles across a large piece of paper. In the picture to the left, painting with marbles quickly became painting with leaves, which became painting with hands, which is great!
Helpful Tips:
Try it outside to save yourself frustration or fear inside. Tape the paper down if you do so it doesn't blow away.
Try painting with toys! Use small plastic animals or dolls and have them leave footprints on the paper. see what their tails do when they walk along. Golf balls, plastic eggs, anything at all! Alternative painting creates amazing art work :)
Creating a Sensory Bin
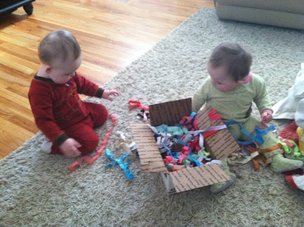
Sensory bin is fancy terminology for box full of stuff to dig through. Sensory bins come in MANY forms. We have at least 4 stashed around at any given time. It can be very simple or as complex as you care to make it. Below is a list of ideas for a bin.
|
Box Full of different colors of elastics and ribbons (pictured above)
Bucket full of cooked or uncooked noodles Cooked noodles are single use ;) |
Dry uncooked beans
Baby Wipes Container full of different textured fabrics. Any new stimulating texture |
Helpful Tips:
If you are going to store and keep your bin, use dry goods and place them in a storage container with a lid.
Add different toys and tools to the bin. Use your dinosaurs to play in the rice. Use shovels and sifters, sand toys.
Add marbles to your water bead bin and have your child sort them by sight. Try again by feel only.
This activity is excellent for the really little one's as long as they are directly supervised with small objects. I would keep them away from water beads and marbles, but don't be afraid of letting them get in to the other things. Keep a watchful eye and have fun!
Dice
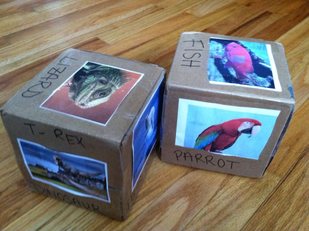
Create your own dice.
I happen to have an overabundant supply of 6x6x6 shipping boxes, but any cube shaped objects will work. Have your child help you create dice. The Animal Dice (pictured left) were made with the kids doing a google image search of animals. They chose which animals and then which picture of the animal they wanted to print. They role the dice and have to act like the animal. Engage their bodies and their vocal abilities.
I happen to have an overabundant supply of 6x6x6 shipping boxes, but any cube shaped objects will work. Have your child help you create dice. The Animal Dice (pictured left) were made with the kids doing a google image search of animals. They chose which animals and then which picture of the animal they wanted to print. They role the dice and have to act like the animal. Engage their bodies and their vocal abilities.
|
The Color Dice (pictured right) were painted by the kids in colors of their choosing. Role the dice and go on a scavenger hunt to find something that color in the house! Or create a life size board game in your house with corresponding colors of construction paper. Imagine a life-sized candy land!
Re-invent this activity with letters, sounds, numbers, pictures of favorite objects, places, or toys. Make up a game that is meaningful to your children. |
|
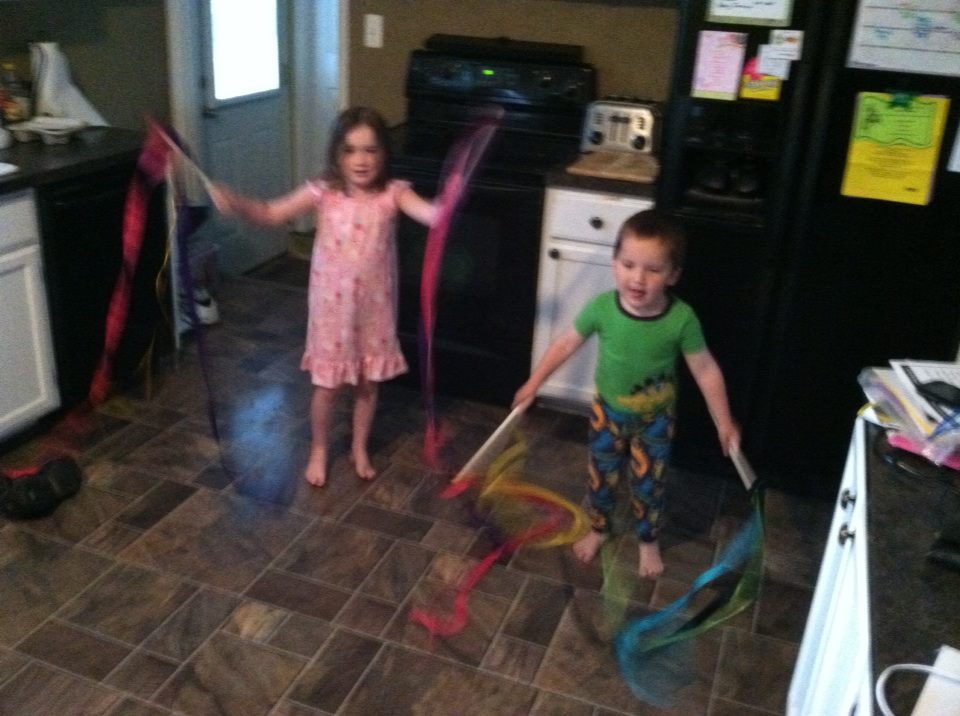
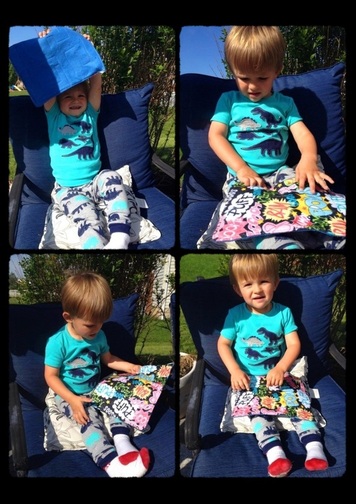
Ribbon Dancer
These cost me about 80cents to make all 4. I bought a 5 pack of short wooden dowels at the dollar store. The kids picked their colors of left over ribbon I had floating around the basement (if you aren't a crafting hoarder they have ribbon at the dollar store too). Hot glue a couple of pieces of ribbon to the end. This activity provides lots of movement and visual stimulation. Create dances or try to have your child repeat patterns or movements. Get crazy!
|
|
|
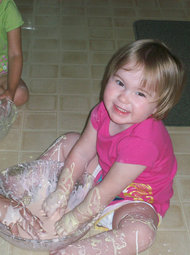
Tactile Foam
For the big kids, I use shaving cream...it has a very unique weight and texture that cannot be achieved with other foaming things. But (as pictured left), for the little ones, I use whipped cream. They are sure to eat it so better safe than sorry! Spray a pile of foam on a surface and let them dig, play, and make a mess!
Helpful Tips:
Bury objects in the foam. For big kids, use small toys. For infants use pieces of fruit or cheerios.
Make clean up easier by putting the shaving cream on the bathtub ledge. Also, this way, if your child gets overwhelmed by the texture the water is right there to rinse it off.
Use the shaving or whip cream on glass or a mirror. Draw in it! Practice letters or numbers or shapes!
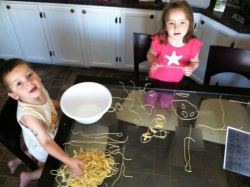
Pasta Art
Cook a bunch of noodles. Different shapes and sizes (spaghetti is the best though). Let it cool. Let them play!
Helpful Tips:
Clean it up fairly quickly when you are done. Dried on pasta residue is much harder to clean than fresh pasta residue!
Another fine opportunity to teach letters and shapes!
Helpful Tips:
Clean it up fairly quickly when you are done. Dried on pasta residue is much harder to clean than fresh pasta residue!
Another fine opportunity to teach letters and shapes!
When you are done you can also throw it in a big bowl with some toys and use it as the days sensory bin!
You can also introduce some plastic knives and help your kids learn how to cut with a knife. Cutting is an excellent fine motor exercise.
You can also introduce some plastic knives and help your kids learn how to cut with a knife. Cutting is an excellent fine motor exercise.
Fun with Flour
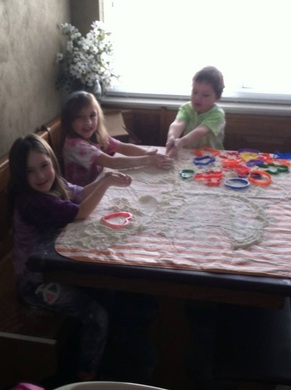
Ok...So I only halfheartedly recommend this ACTUAL activity. Mess factor - 1,000,682. We were in a pinch one day and the kids needed something to do and I had two cranky infant twins. I was running low on supplies. I told the kids to go put on old play clothes. I opened a table cloth and dropped nearly an entire bag of flour on the table. I gave them cookie cutters and other kitchen tools and they went to town. They had SO MUCH FUN! And they were busy for like ever! But the clean up was probably our worst in history. I think there is still flour stuck in the cracks of my corner nook.
Here's what you can do - If you have more supplies on hand, make moon sand. Add baby oil to your flour. Let's say 7 cups of flour to 1 cup of oil. (I've read vegetable oil works too but haven't tried it. It's still messy and super fun...but not as chaotic a mess as straight flour. Plus you can add cool things like glitter and make an indoor snowy mountain or castle or whatever.
Adapt this activity to whatever you have on hand. Even playdough. Just throw out different items on the table and hand over the cookie cutters and spatulas and whisks. They will do the rest!
Milk Fireworks
So, this is more of a science thing, but it does provide some visual sensory input...plus it's fun!
Take a shallow dish and pour in a layer of WHOLE MILK - NOT TOO DEEP.
Take few drops of food coloring and add to milk - do not mix.
Take a cotton swab dipped in liquid dish soap. Place in milk and watch the colors move. Add more than one cotton swab to send the colors swirling in different directions.
FOR THE WHY PEOPLE?
I'm a why person so I checked it out. Basically the dish soap weakens the chemical bonds in the milk and then the soap molecules race around trying to join up with the fat molecules and the colors get pushed around by the bending, moving fat molecules....LONG story short ;)
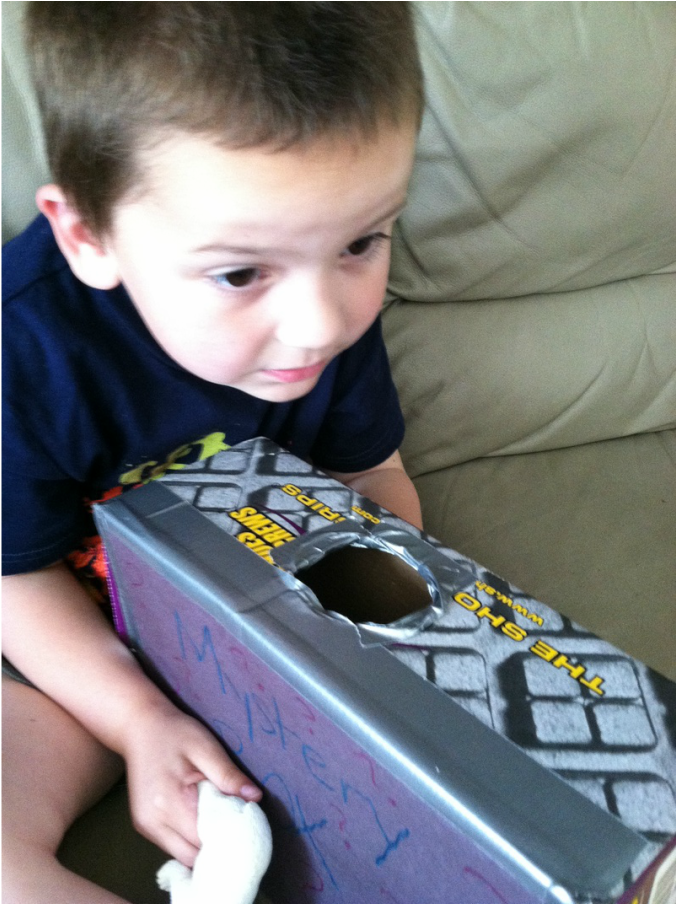
The Mystery Box
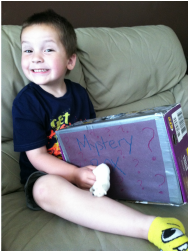
Get an old shoe box, preferably one where the lid is attached on one side and slips into itself to close.
Decorate it :)
Cut a hole in the side with a utility knife. We covered the hole in ours with duct tape so that it didn't scratch us.
Decorate it :)
Cut a hole in the side with a utility knife. We covered the hole in ours with duct tape so that it didn't scratch us.
|
Put objects inside and take turns feeling the object and trying to identify it. Great for tactile senses, critical thinking, language development, etc. One of our favorite toys, it gets used and reused frequently! |
Joie de Potato
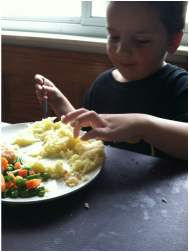
The potato...so simple...so easy...so perfectly, perfect.
1. Peel a bag of potatoes into a bowl. Congratulations! You've just made your sensory bin filler for the day. Add some toys later on and play!
2. Let your older toddler/preschooler/young child cube the potatoes. Under close supervision, and probably hand over hand guidance, help them cut the potatoes. This is excellent proprioceptive work and works in some fine motor control.
3. Boil your potatoes. Use it as a science lesson, or use it as a break for your child to play with their new peel sensory bin.
4. Have your child mash the potatoes! It's easy and fun and who cares how chunky/whipped your potatoes are. More good proprioceptive work!
5. Put potatoes on your dinner plate. Congratulations! You just made a dinner side :)
6. Here's the hard part...encourage your child to play with their food. Build a castle. Squish it around. Draw in it. Amazing tactile material.
BONUS! Children are generally more likely to eat and try things they helped make!
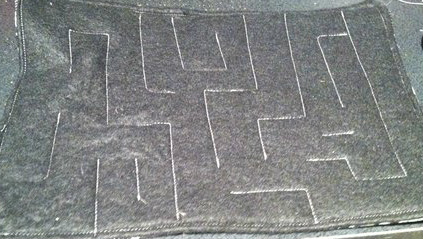
DIY Marble Maze
If you own a sewing machine and know how to turn it on, you can make this...
Take 2 pieces of fabric (for more sensory input, use two different textures). Sew the right sides together but leave a small opening on one side so you can flip it right side out.
Flip it.
Top stitch around the edge. Top stitching is fancy for literally sewing on the top/right side of the fabric...that's it. Before you close up your gap with your fancy top stitch, put a marble in between your fabrics.
Next, sew random lines in different directions around the inside of your fabric, creating a maze. Make sure the spaces are big enough for the marble to fit through.
Voila! It's a quiet, easy, sensory manipulative toy. It's tactile. It's fine motor. It's critical thinking. It's problem solving. It's small motor planning. It's quiet. Did I mention quiet? ;)
Great car/travel toy.
If you can't sew at all...or just don't want to...buy one on Etsy.
DIY Sensory Board
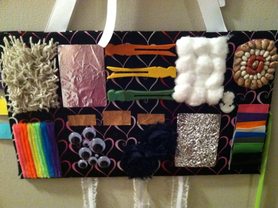
Create your own sensory board!
These work great for even the youngest among us :)
This one was created using the sides of a diaper box. I covered two sides in fabric, sandwiched some fun ribbons and things in between, and glued them together.
The individual tactile sections were mostly made on cards from a standard deck.
TOP FROM LEFT TO RIGHT - old carpet square, tinfoil smoothed out, colored craft clothespins, cotton balls, dried beans.
BOTTOM FROM LEFT TO RIGHT - pipe cleaners, googly eyes, sand paper, fabric flowers, tinfoil squished, a resin cameo, colored duct tape.
These were all random things I found around the house. Use whatever you have on hand. Secure it well to the board and always watch young children because they are sneaky and will pull something off and eat it!
NOTE: Do not use cotton balls as I did above. They were the first to go. Try craft pom poms instead as they are constructed in one piece. A cotton ball will shred and never securely stay on your board. the twins had it off within the first two days at only 5 months old. Play and learn...
DIY Lock Board

Literally under construction :) Will share as soon as we finish it and test it out! Check back soon!
